Saturday, November 30, 2013

A Depth Sounder for 'Minnow'


It’s the time of year when autumn leaves cover my garden. Action was required to get rid of them. Therefore I took the opportunity to exercise my body by disposing of them in the green waste bin.

While I laboured with a rake and a garden vacuum cleaner, I exercised my mind by pondering ‘Minnow’s’ lack of a depth sounder. I have a lead and line for taking soundings, but finding depths by this old-fashioned method is not as convenient as by an electronic sounder. Observing a series of readings on a digital screen requires little effort.

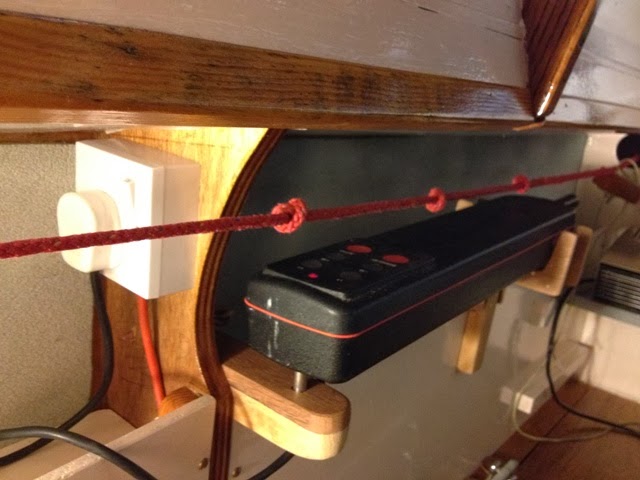
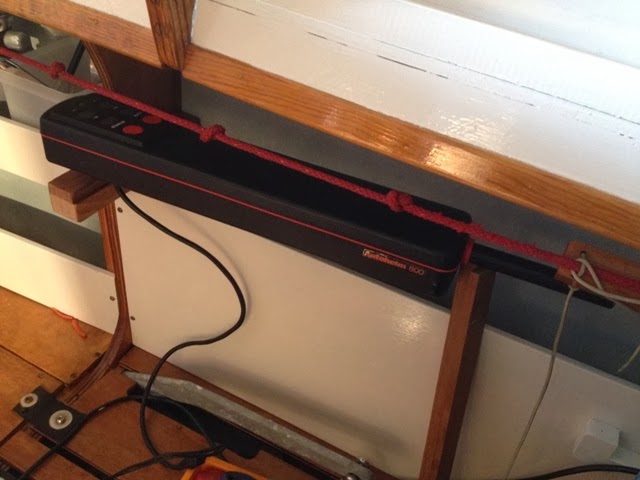
Focussing on the subject, I considered the possibility of installing a NASA Marine Sting Ray sounder I have, but it lacks a power cable and a transducer. By comparison with modern sounders, it looks old-fashioned. Modern digital sounders are more compact, more precise, and they are easier t read.

Nevertheless, I may install my Sting Ray if I can obtain the missing components for only a few pounds.

Friday, November 29, 2013

‘Minnow’s’ Yuloh – Part 3 (Yuloh Links)


The epoxy cured overnight, and this morning I sanded the yuloh’s shaft in preparation for varnishing. I also started sanding the blade to give it a better finish. I’ll paint the lower part of the yuloh.

Until I receive a stainless steel pivot pin from the firm that is manufacturing it, I am reluctant to drill into the shaft to form a cavity for the pivot cup. I shall use the pin to shape a cup in an epoxy base – that is my plan. I’ll coat the rounded end of the pin with grease to prevent it from sticking to the epoxy. The reciprocal pieces should fit together perfectly.

I shall have to devise a means of suspending the pin in the epoxy so that no more than half of the ball is submerged in the epoxy. If that were to happen I would not be able to extract the pin from the cured epoxy without cutting into it.

Links

Wooden Boat NZ Sculling


How to Scull a Boat


Bing Yuloh Images


The $10 Yuloh


Single Oar Sculling


Yuloh, Zhujiajiao, China


Stevenson Pocket Cruiser under Yuloh


AD-scull. sculling action,deck view


Easy Go Yuloh – Part One


Easy Go Yuloh - Part Two


Cranks with Planks


Yuloh – Dave’s Wiki


Collars – The Yuloh Sculling Oar


Yuloh Design Cycles


Sailing Auklet – The Yuloh

Thursday, November 28, 2013

‘Minnow’s’ Yuloh – Part 2


Having sawn off the tip of the yuloh’s blade yesterday, I had the will and heart to saw through the shaft today to remove a wedge from it for the purpose of imparting curvature to the shaft. I felt pretty confident that what I was doing was right. The shaft had to have a bend put into it to continue the curvature from blade to handle. The whole thing now looks right - apart from the blade, which may be a little too wide.

This adjustment allows the yuloh to nestle beside the coachroof out of harms way on the starboard side, but I shall have to make supports for retaining it there. The boat plans show a loop of brass tubing adjacent to the aft end of the coachroof, and a smaller loop on the foredeck for securing the end of the shaft.

I believe the trickiest part of modifying the yuloh to improve its efficiency, will be adding a pivot cup.

 I never liked the idea of putting the yuloh into a rowlock, because of friction between them, resulting in wear to the shaft. As it is, the shaft has been damaged for this very reason. The pivot cap has to be located deep into the shaft for retaining the yuloh. I think it’s probably better to have the hole for the cap drilled into the shaft at an angle, so that the yuloh can be hooked onto the pivot pin.  The buoyancy of the blade and lower end of the shaft will tend to thrust the yuloh upwards; therefore a restraining line tensioned by a bungee may be required to prevent it parting from the pin.

Wednesday, November 27, 2013

‘Minnow’s’ Yuloh


On measuring ‘Minnow’s’ yuloh I discovered it was about a foot too long, and the extra length was in the blade. Not only was the blade too long, but it was too wide by 55 millimetres. The less width a blade has, the faster must be the action for thrusting a boat forward at a required speed.

Matt Layden, the designer of Paradox’s yuloh, would appear to prefer low geared yulohs, i.e., those with narrow blades and long shafts - presumably because less effort is required to move them through the water, but paradoxically, more strokes are required to advance the boat the same distance a boat powered by a higher geared yuloh would travel. If a higher geared yuloh is stroked at the same rate as a lower geared one, the vessel driven by the higher geared yuloh will arrive at a destination first.

I’ll keep the existing width of the blade at 148 millimetres for a higher geared yuloh than Matt advocates. The plan shows a maximum width of 94 millimetres. If I find that working the yuloh is too much hard work, I can always reduce the width of the blade. Initially, I will not cap the tip of the blade with fibreglass, because I may have to decrease the width.

If my memory serves me correctly, some people who made standard Paradox yulohs discovered they worked better if the pivot cup was moved up the shaft by about 70 millimetres. A better balance was obtained, and the yuloh sat more happily on the pivot pin. In light of this, I shall place the pivot cup on my yuloh 70 millimetres higher up the shaft than shown on the plan.

The yuloh I have inherited has a straight shaft, whereas the plan shows a curved one. The blade itself has been set at an angle to the shaft - rather more than depicted on the plan. In view of this, I think I shall cut and remove a thin wedge from the shaft, and rejoin the parts by epoxying them together.

I am giving thought as to how to make a stowage rail for the yuloh on the starboard side deck. The plan shows a ¼ inch brass pipe in the form of a loop. There is also a semicircular strap from the same pipe bolted to the foredeck for securing the end of the yuloh’s shaft. I may modify a rowlock for securing the shaft to the deck.

Tuesday, November 26, 2013

'Minnow's' Outboard Bracket


When Derek built ‘Minnow’ (Enuf) he placed the outboard bracket to suit his Honda 2.3. I was able to fix my bracket in exactly the same position with the same holes through the transom. I have an old Honda 2 HP outboard which has similar dimensions and weight to those of Derek’s more modern engine.

I’m happy about installing the outboard, because I know it will be very useful for moving the boat in confined spaces such as in a marina or among closely moored boats. Tides on the East Coast where I do much of my sailing can be strong, particularly on springs, and if I find myself in a situation where it is imperative to make way against the current, I can resort to the engine. I have found that when it is calm and the sea is smooth, a Honda 2.3 HP outboard can propel a Paradox at 3 plus knots with the throttle set at less than a third of full power.

If the wind is on the nose and headway is not great, I shall be able to motor-sail for making better progress.

Points in favour of having an engine outweigh those for not having one. The biggest ‘snag’ of having one is ‘snagging’ of the sheet on the engine, and if the sheet happens to become tangled in the propeller, getting it free can be a problem. I’ve done it, but leaning over the stern and reaching out to the prop is not for the fainthearted! You definitely do not want to be doing this in a seaway.

I am trying to work out how best to avoid this situation. Pete who owns ‘Johanna’ has made a kind of cage attached to his outboard to minimize snagging, but as far as I can tell, it does not prevent the sheet from becoming tangled in the prop. I note that he has changed the sheet leads to come from the aft deck, instead of from the transom, and that may solve the problem.

If anyone can make suggestions for keeping the sheet clear of the engine, I’ll certainly take note of them.

Monday, November 25, 2013

Fitting ‘Minnow’s’ Autohelm 800.


Finally I fitted the metal socket for supporting the Autohelm. To ensure it will stay put, I set it into epoxy within a drilled hole, and before doing so, I cleaned the surface of the metal and abraded it for better adhesion. I finished everything on the Autohelm supports, including the application of three coats of varnish on all of the wooden parts.

Sunday, November 24, 2013

Identity and Fulfilment


There comes a time in life when you know who you are, or at least some people mature sufficiently to know who they are.

What visible traits identify you? There is something special about identity, perhaps a characteristic that is unique. Each of us can be identified by our finger prints, and by our DNA.

My grandchildren call me Grandad Boat, because they know of my love of boats. They call their other grandfather, Grandad Keyboard, because they know of his passion for playing a keyboard.

When we are mature enough to recognize who we are by what we stand for, and by what we do, we have become of age. We may not like what we see, and as a result, have a midlife crisis, but that can be a positive experience, because we can see our failings, our weaknesses and our vulnerability. With this insight and our acceptance of the facts, we can take steps to capitalize on our strengths, our skills and our abilities to bring a turnaround. We can become proactive and change our lives for the better. We can be our true new self - no more self-pity, no more childishness, and a lot less self-centredness and self-seeking.

I can speak of these things because I have experienced them and found them to be true.

Over the weekend I met a man who has discovered himself. He knows his strengths; he recognizes his skills and he is putting them to good use to earn a living. He has come of age, and is a lot happier for it. He is living a fuller and more profitable life as a result.

John 10:10 ‘I have come that they may have life, and have it to the full.’

1 Thessalonians 4:11, 12 ‘Make it your ambition to lead a quiet life: You should mind your own business and work with your hands, just as we told you, so that your daily life may win the respect of outsiders and so that you will not be dependent on anybody.’

Saturday, November 23, 2013

A little more done on 'Minnow'

I am  away for the weekend, but I managed to put a second coat of varnish on the Autohelm supports before leaving. I also packed away tools and disposed of rubbish that had accumulated in the boat when making and fitting the Autohelm supports.

The Autohelm mounting socket arrived in the post this morning; therefore I shall be able to fit it into the forward support, perhaps on Monday or Tuesday.

A job I must do is to attach the outboard bracket.


Friday, November 22, 2013

Varnishing ‘Minnow’s’ Autohelm Supports etc


Unable to set aside more than 30 minutes for working on ‘Minnow’, I used the time to varnish the Autohelm supports, and other unvarnished wooden items within the cabin.

Thursday, November 21, 2013

Solution for ‘Minnow’s’ Autohelm


I have been thinking of a solution for instantly attaching the arm of the Autohelm to the steering line, and today it suddenly dawned on me how it could be done. I found the bits I required in my bosun’s box: a small length of MDPE yellow gas pipe; an old cleat, two bolts and nuts; a jubilee clip; a tiny piece of stainless rod for a fixing pin, and a small length of cord.

The fixing pin ensures there is no forward and backward movement of the gas pipe, and it is kept in place with the jubilee clip which also clamps the pipe to the end of the Autohelm’s arm.

The photos show how the device was made.

Attaching it to the line is almost instantaneous. A cord is permanently tied to the cleat and it is left hanging over the steering line. To engage the Autohelm, simply wind the cord around the steering line and cleat home. To ensure the steering line does not part from the cleat, make another turn around it and cleat home.

An advantage of this system over the double cord linkage is the immediacy of fixing and unfixing the rod to the steering line. Only one attachment has to be made, and because the attachment is rigid, there is no play.

I think this arrangement is superior to the one I had on ‘Faith’, but I’ll have to see what happens in practice.

Wednesday, November 20, 2013

Satisfying Afternoon with ‘Minnow’


I completed the wiring for the Autohelm 800. The autopilot can be plugged into a household three-prong socket that is wired to the ship’s battery. The wire is thick, multifilament copper to facilitate the flow of electricity, and I have kept it short to minimize resistance. The socket has an on/off switch for immediate activation and deactivation.  I can plug into it a multi-plug socket for powering my mobile phone and other equipment at the same time. I shall have to change the fuse from 13 amps to 5 amps. I may run a portable all-round white anchor/navigation light from it.

I derived satisfaction from doing the wiring. The weather was cold and damp, but inside ‘Minnow’s’ cabin I was snug. I ran my small blow heater, and the inspection lamp also threw out heat.

Because one can live on a Paradox for months at a time, George Clarke could well feature a Paradox on his Channel 4 0 D TV programme. (George Clarke’s Amazing Spaces) Did you see Episode 1 of the 2013 series in which he featured a floating egg made from double diagonal planking with a layer of epoxy glass matting between? Boat builder, Paul Baker did a first-class job building the egg.

Links

George Clarke’s Amazing Spaces


Meet the man who lives and works in an egg: Giant floating wooden pod is artist’s home.


Stephen Turner’s Exbury Egg


Stephen Turner’s Blog


Exbury Egg – YouTube - featuring Paul Baker


Tuesday, November 19, 2013

Better Progress with ‘Minnow’


Apart from inserting a bronze socket into the forward support for the Autohelm, and varnishing both supports, they are finished.

I am still trying to devise a more effective linking mechanism than I had aboard ‘Faith’, i.e., cords tied to the steering line - one forward and another astern, each attached with rolling hitches.

 Ideally, the physical act of linking the Autohelm to the steering line should be easy and quick, and there should be no play between the two.

Monday, November 18, 2013

Accomplished Something with ‘Minnow’


I started building the second support for ‘Minnow’s’ Autohelm 800. Both supports will require more doing to them.  The crucial part of the system will be the link between the Autohelm and the steering line. Previously on ‘Faith’, I joined them with cords that were permanently attached to the end of the Autohelm’s steering arm. As yet I have not devised a better method.

Sunday, November 17, 2013

Major Distractions from 'Minnow' - Part 2

The three little monkeys were a joy today. They saw no evil; heard no evil, and spoke no evil.

Well done boys!


Saturday, November 16, 2013

Major Distractions from ‘Minnow’


The Three Monkeys required attention. Hence ‘Minnow’ didn’t’ get a look in.

There could be a repeat tomorrow. 

Links

Three Wise Monkeys


The Three Monkeys


Origin of See no Evil, Hear no Evil, Speak no Evil

Friday, November 15, 2013

‘Minnow’s’ Autohelm – Part 2


Having very little time for working on ‘Minnow’ today, I was pleased that I was able to make a start at mounting the Autohelm 800.

I partially made a wooden support for the Autohelm. This will require a proper bronze socket for securing the device. I shall have to have another support at the other end. My plan is for the supports to be removable for when I am not using the Autohelm.

My biggest challenge will be designing and making an efficient connection to the steering line. If I cannot come up with a better solution than I had with ‘Faith’s’ setup, I’ll have to be satisfied with it.

Incidentally, I have decided to have the Autohelm on the starboard side, with its rod pointing towards the stern.

Thursday, November 14, 2013

‘Minnow’s’ Autohelm


I’ve owned an Autohelm 800 for a good many years, and it has seen service on several of my boats. I’m surprised the device still works after experiencing harsh conditions - once being under seawater when ‘Sandpiper’ nearly capsized.

I’m pretty sure I set it up on the port side within the cabin of my old Paradox. The rod pointed towards the bow. Looking at photos posted by Glen Maxwell to the Paradox Builders Yahoo! Group’s forum, I note that his Autopilot was mounted on the starboard side with the rod pointing towards the stern.

If you are a member of the Paradox Builders Yahoo! Group Forum you can see photos of Glen’s Autopilot by clicking this link: http://groups.yahoo.com/neo/groups/paradoxbuilders/files/Zoe%27s%20Autopilot%20Setup

I shall be doing something similar, but I’ve not decided which side of the cabin I shall mount the Autohelm. At the moment I’m favouring the starboard side, from where it will be wired directly to the ship’s battery.

Like Glen, I linked my Autohelm to the steering line with cords, but that method was not really quick enough to engage, nor was it as positive as I would have liked, because there was always a certain amount of play. I’m trying to devise a better system.

Wednesday, November 13, 2013

Electrics for ‘Minnow’ – Part 3


I finished mounting and wiring the cigarette lighter socket for the GPS units etc.

I was very pleased with the result.

All I need to do is varnish the mount.

My next job will be fitting and wiring the Autohelm 800. The tricky part will be linking it to the steering line. When I had ‘Faith’, I linked the end of Autohelm’s rod to the steering line with two pieces of cord. They were attached with rolling hitches, one forward, and the other aft. As far as I remember, the Autohelm was mounted fore and aft on the port side with the rod towards the bow.

 That worked OK, but I would like a quicker method of linking and unlinking the Autohelm. The ability to release the linkage quickly is crucial: for example, if there is a risk of collision with a nearby object.